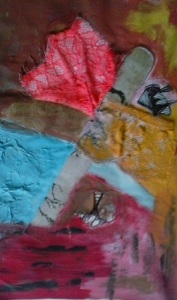
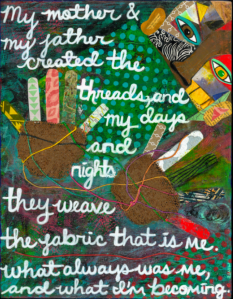
In this post, I would like to do a step by step process showing a couple of simple techniques that I use to come up with backgrounds for paintings. I sometimes do these kind of backgrounds on small cards and then write over them with either song lyrics or poetry and I also use these techniques on bigger paintings as well.
Fun Fact: The reason I started doing these techniques on small pieces of paper is because I was using the smaller pieces of paper to add paint to bigger paintings and then I started re-using those very pieces of paper, adding onto them and make smaller creations!
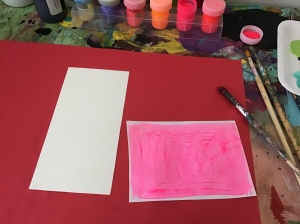
What you will need:
- Thick paper, which could be Mixed Media, Bristol or Watercolor paper
- A thinner type of paper, like printer paper
- Scissors
- A paintbrush or two
- Acrylic paints
- A palette for your paints (I use paper or styrofoam plates)
- A cup of water
- Paper towels to clean up messes
LET’S GET STARTED!
Step 1.
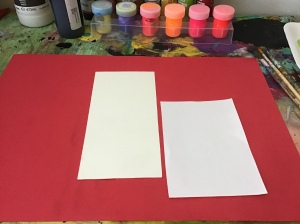
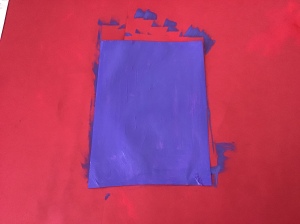
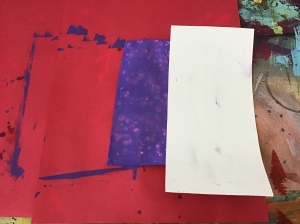
You can choose a piece of paper that is already cut to the size that you want, or you can cut a bigger piece of paper to make it smaller. Here, I cut a big piece of Bristol paper to make it a bit smaller.

Step 2.
Grab a piece of printer paper or another type of thin paper and cut it as well. I cut mine a little bit smaller than the Bristol paper, but you can cut your printer paper so it’s the same size as the thicker paper or smaller.
The idea is that both of these pieces of paper will have backgrounds and can be used as small art cards.
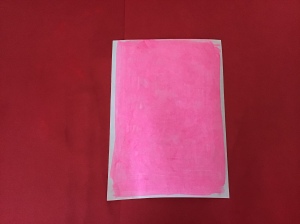
Step 3.
For this demonstration, I only used two different colors of paint but you can use more and add more to the card itself.
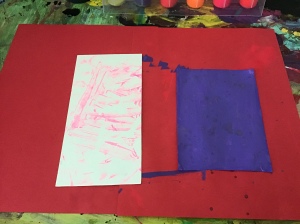
You’ll want to start by adding paint to the printer piece of paper. You can completely cover it or leave some of the edges white.
Step 4.
This technique is akin to printmaking or stamping. Right after applying the paint, grab the thicker piece of paper.
While the paint is still wet, you are going to put the painted paper face down on the blank, thicker paper…

and press down.
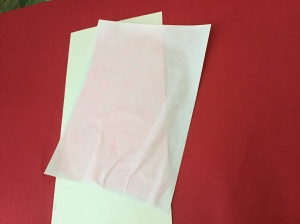
Then, slowly pull the piece of printer paper back from the thicker paper.
You can continue to do this technique on different parts of the thicker paper.


Step 5.
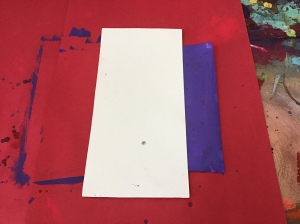
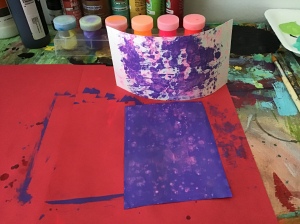
Then you will hold onto the printer or thinner piece of paper where the paint should now be dry or mostly dry. Choose a different color and paint over the first color.


Step 6.
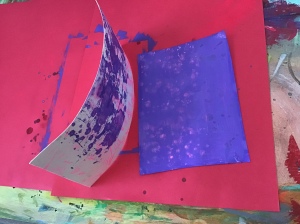
Once you have the thinner piece of paper covered in the second layer of paint, while the paint is still wet, you will use the paintbrush to splatter water onto the paper, over the paint.

Let the water sit for one minute and grab your thicker piece of paper again.
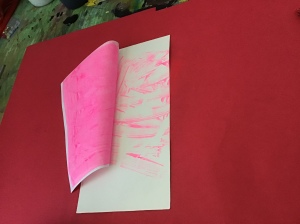
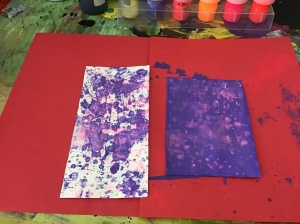
Step 7.
Take your thicker piece of paper and after the one minute, lay the side that has the remnants of paint onto half or the whole piece of paper that has the water on it, and press down firmly.
Then slowly pull the top piece of paper away from the bottom piece.
I chose to do half of the paper first and then the other half because the thinner paper is a little wider than the thicker paper and I wanted to make sure to pull back the water and paint as evenly as possible.
You will want to continue this technique on different parts of the paper so it has an even amount of paint and not a lot of white space in one spot.
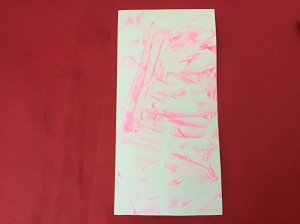
And here is the end goal of these two particular techniques…..
You can continue to build on these and add other colors of paint. Or you can add writing over the backgrounds using a marker or paint.
I will continue doing blog posts showing other simple and fun techniques and then in a few weeks, I will do a video of a bigger painting that implements all of the techniques that I’ve shown on here.
Thank you for stopping by! Happy painting!